
Bamboo Floor Care for Lasting Elegance Explore Effective

Bamboo Floor Care for Lasting Elegance
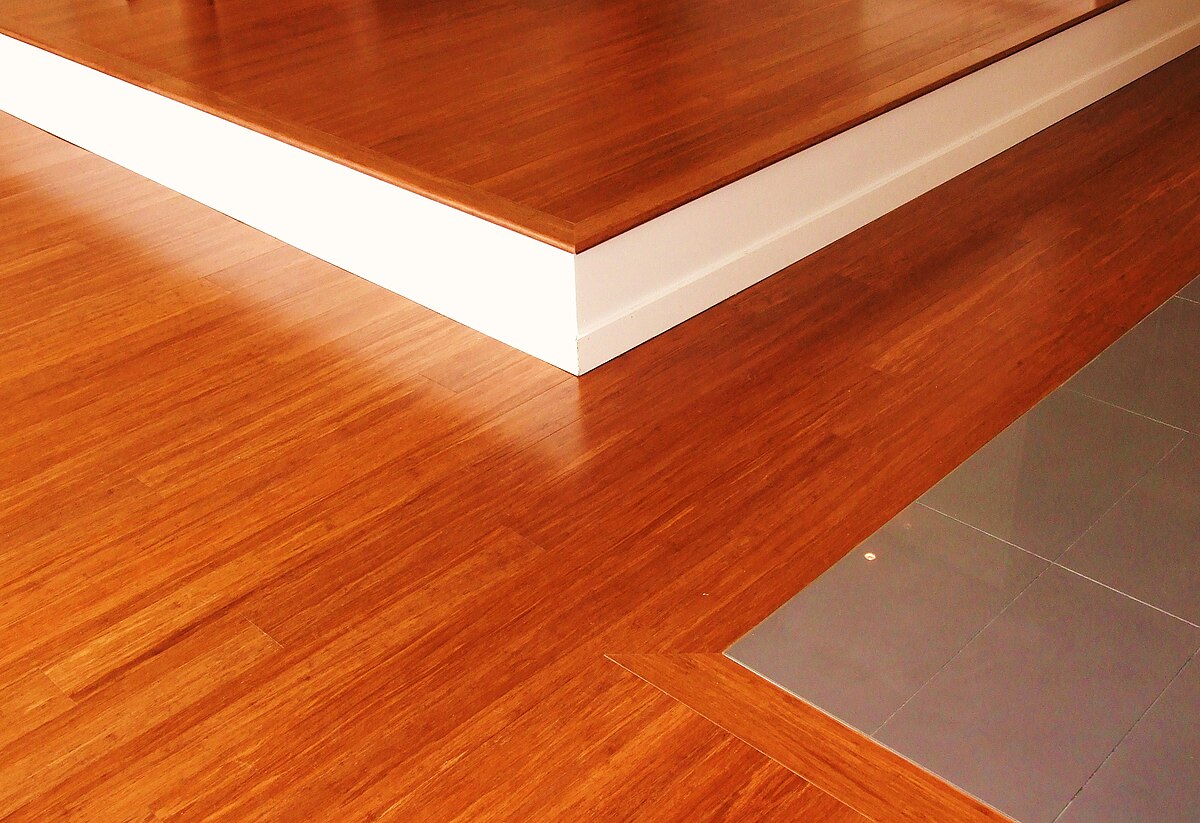
Bamboo flooring offers a unique blend of natural beauty and sustainability. To ensure its longevity and preserve its elegant appearance, proper maintenance is essential. Explore effective bamboo floor maintenance practices that will keep your floors looking stunning for years to come.
Understanding Bamboo’s Unique Qualities: A Natural Beauty
Before delving into maintenance tips, it’s crucial to understand the unique qualities of bamboo. Bamboo is a grass, not a hardwood, but its density and strength make it an excellent flooring material. Its natural beauty lies in the distinctive grain patterns and warm tones, offering a sophisticated and eco-friendly flooring option.
Daily Cleaning Routine: Gentle and Consistent Care
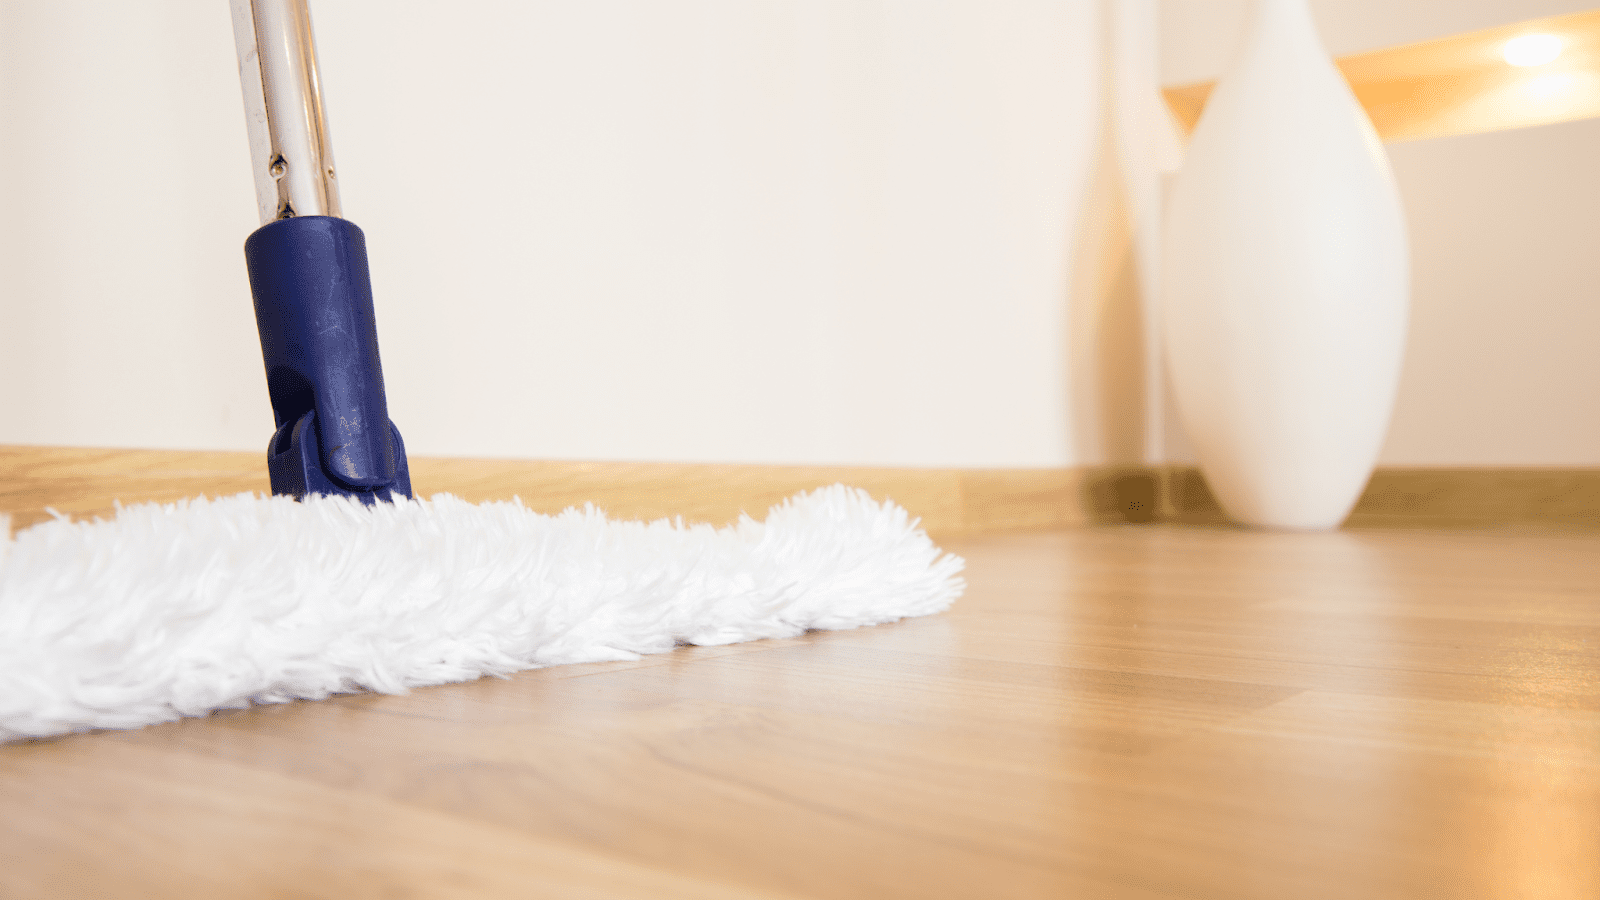
Maintaining bamboo floors begins with a daily cleaning routine. Use a soft-bristle broom or a microfiber dust mop to remove dirt and dust. This gentle cleaning method prevents scratches and preserves the floor’s finish. Regular cleaning helps prevent the accumulation of debris that could potentially cause damage over time.
Avoiding Water Damage: Moisture Control Measures
Bamboo is sensitive to excessive moisture, so it’s crucial to avoid water damage. Wipe up spills promptly using a dry or slightly damp cloth. Avoid using wet mops or excessive water during cleaning. Additionally, use moisture-absorbing mats in high-risk areas like entryways to protect your bamboo floors from potential water damage.
Protective Furniture Pads: Preventing Scratches and Dents
Prevent scratches and dents by placing protective pads on the legs of furniture. This simple yet effective measure ensures that heavy furniture or chairs won’t leave unsightly marks on your bamboo floors. Regularly check and replace the pads to maintain their protective qualities over time.
Explore comprehensive Bamboo Floor Maintenance tips on our website. Discover a range of products designed to enhance the longevity and beauty of your bamboo floors. From cleaning solutions to protective pads, our collection caters to the specific needs of bamboo flooring.
Regular Inspections: Detecting Issues Early
Perform regular inspections of your bamboo floors to detect any issues early on. Look for signs of wear, scratches, or potential water damage. Addressing these concerns promptly prevents further damage and allows you to implement targeted maintenance strategies.
Gentle Cleaning Solutions: Choosing the Right Products
When cleaning bamboo floors, opt for gentle and bamboo-friendly cleaning solutions. Avoid harsh chemicals or abrasive cleaners that can damage the finish. Use a pH-balanced bamboo floor cleaner or a mixture of mild dish soap and water for effective yet gentle cleaning. Always follow the manufacturer’s recommendations for cleaning products.
Periodic Deep Cleaning: Refreshing Your Floors
In addition to daily cleaning, periodic deep cleaning is necessary to refresh and revitalize bamboo floors. This involves using a bamboo floor cleaner designed for deeper cleaning. Be cautious not to oversaturate the floor during deep cleaning, and always follow the product guidelines for the best results.
Refinishing When Needed: Restoring the Luster
Over time, bamboo floors may show signs of wear, scratches, or dullness. In such cases, refinishing becomes a valuable maintenance step. Consult with flooring professionals to determine the best refinishing
Shine On: DIY Floor Polish for Brilliant Surfaces


Revitalize Your Floors: DIY Floor Polish for Brilliance
Maintaining the luster of your floors doesn’t always require expensive commercial products. With a bit of creativity and a DIY spirit, you can create an effective and budget-friendly floor polish at home. Let’s delve into the world of DIY floor polish and discover how you can bring a brilliant shine to your surfaces.
Understanding the Basics of DIY Floor Polish
DIY floor polish is a cost-effective alternative to store-bought products, often made with common household ingredients. The basic components typically include a combination of natural oils, vinegar, and water. These ingredients work together to clean, condition, and add shine to various floor surfaces.
The Power of Natural Oils: Nourishing Your Floors
Natural oils such as olive oil or jojoba oil play a crucial role in DIY floor polish. These oils provide a natural sheen to the floors while nourishing and conditioning them. When combined with other ingredients, they create a potent solution that not only enhances the appearance of your floors but also adds a protective layer.
Vinegar for Cleaning and Degreasing
Vinegar, a staple in many DIY cleaning solutions, is a key ingredient in floor polish as well. Its acidic nature helps to break down dirt, grime, and grease on the floor surface. Additionally, vinegar acts as a natural disinfectant, making it an excellent choice for cleaning and polishing your floors.
Water: The Universal Solvent
Water serves as a base for DIY floor polish, ensuring that the solution is easy to apply and spread evenly across the floor. The addition of water helps maintain the right consistency, allowing you to cover larger floor areas without the need for excessive product usage.
Creating a Simple DIY Floor Polish Recipe
Crafting your DIY floor polish is a straightforward process. Mix equal parts of natural oil, vinegar, and water in a container. Stir the ingredients well to ensure they are thoroughly combined. The result is a versatile and effective floor polish that can be applied to various surfaces, including hardwood, laminate, and tile.
Application Tips for a Gleaming Finish
Applying DIY floor polish is simple and requires minimal effort. Use a clean mop or microfiber cloth to apply the polish evenly across the floor surface. Allow it to dry completely before walking on the polished area. The result? A gleaming finish that brings out the natural beauty of your floors.
DIY Floor Polish: A Link to Cost-Effective Brilliance
For a cost-effective and eco-friendly solution, try making your own DIY Floor Polish. Our easy-to-follow recipe ensures that you can revitalize your floors with a brilliant shine using ingredients readily available in your home. Embrace the DIY spirit and experience the satisfaction of creating a floor polish that enhances your living space.
Conclusion: Embracing Sustainable Floor Care
In conclusion, DIY floor polish is a sustainable and effective way to maintain the brilliance of your floors. With natural oils, vinegar, and water, you can create a powerful cleaning and polishing solution. By incorporating DIY floor polish
Bedroom Cleaning Routine: Tips for a Tidy Sanctuary


Unlocking the Secrets of an Effective Bedroom Cleaning Routine
Maintaining a clean and organized bedroom is essential for creating a peaceful sanctuary. A well-thought-out bedroom cleaning routine not only ensures a tidy space but also contributes to a restful atmosphere. Let’s explore some tips to help you establish an effective bedroom cleaning routine.
Decluttering for Serenity
The first step in any successful bedroom cleaning routine is decluttering. Remove items that don’t belong, organize clothing and accessories, and clear surfaces of unnecessary clutter. Decluttering sets the stage for a more manageable and visually appealing cleaning process.
Refreshing Bed Linens
The focal point of any bedroom is the bed, and keeping it fresh is crucial. Establish a routine for changing bed linens, including sheets, pillowcases, and duvet covers. Regularly washing and rotating bedding not only contributes to cleanliness but also promotes a comfortable and inviting sleep environment.
Dusting and Wiping Surfaces
Dust tends to accumulate on various surfaces in the bedroom, from dressers to nightstands. Incorporate regular dusting into your cleaning routine using a microfiber cloth or duster. Additionally, wipe down surfaces with a gentle cleaning solution to remove any built-up grime and keep furniture looking pristine.
Vacuuming and Floor Care
Regular vacuuming is essential for maintaining clean and allergen-free bedroom floors. Pay special attention to high-traffic areas, under furniture, and along baseboards. If your bedroom has hardwood or laminate floors, consider using a floor cleaner suitable for the specific material to ensure proper care.
Tackling Closet Organization
An often-overlooked aspect of bedroom cleaning is closet organization. Regularly assess clothing, shoes, and accessories to declutter and make space for new items. Implement storage solutions like bins and hangers to maintain a well-organized closet, making it easier to find what you need.
Washing Windows for a Clear View
Clean windows contribute to a brighter and more inviting bedroom. Include window cleaning in your routine to remove smudges and dirt. Use a streak-free cleaner and a lint-free cloth for optimal results. Clean windows allow natural light to filter in, enhancing the overall ambiance of the room.
Paying Attention to Electronics and Tech
In today’s technology-driven world, bedrooms often house various electronics. Incorporate cleaning and organizing these devices into your routine. Dust and wipe down surfaces, untangle cords, and consider implementing a charging station to keep electronics neatly organized.
Deep Cleaning Periodically
In addition to your regular cleaning routine, schedule deep-cleaning sessions periodically. This includes tasks such as washing curtains, cleaning upholstery, and thoroughly dusting and vacuuming hard-to-reach areas. Deep cleaning ensures a more comprehensive and thorough maintenance of your bedroom space.
Maintaining Air Quality
Consider incorporating measures to maintain air quality in your bedroom. Regularly change air filters, keep windows open for ventilation, and consider using air purifiers. A clean and well-ventilated bedroom promotes a healthier living environment.
Creating a Relaxing Ambiance
Ultimately, a bedroom cleaning routine goes beyond just tidying up. It’s about creating a relaxing ambiance that enhances your well-being. Consider adding elements like soothing scents, soft lighting, and personal touches to
Herringbone Floor Care: Tips for Lasting Elegance


Preserving Elegance: Herringbone Floor Maintenance Tips
Herringbone floors, with their timeless and sophisticated pattern, add a touch of elegance to any space. To ensure these stunning floors maintain their beauty for years to come, proper maintenance is essential. Explore the following tips for effective herringbone floor care.
Understanding Herringbone Floors: A Unique Aesthetic
Before diving into maintenance tips, it’s essential to appreciate the unique aesthetic of herringbone floors. The distinctive zigzag pattern creates a sense of luxury and character. Understanding the intricacies of this design helps tailor maintenance practices to preserve its timeless appeal.
Daily Cleaning Routine: Gentle Care for Delicate Floors
Establishing a daily cleaning routine is the foundation of herringbone floor maintenance. Use a soft broom or a vacuum with a hardwood floor attachment to remove loose dirt and debris. Avoid abrasive brushes that can potentially scratch the delicate surface. This gentle care sets the stage for a lasting shine.
Damp Mopping: The Right Technique Matters
When it comes to mopping, the right technique is crucial. Use a damp, not wet, mop to clean herringbone floors. Excess water can seep into the seams and cause damage over time. Opt for a pH-neutral, herringbone floor-friendly cleaner to maintain the wood’s integrity while effectively cleaning the surface.
Dealing with Spills Promptly: Prevention is Key
Spills are inevitable, but addressing them promptly is key to preventing damage. Wipe away spills immediately with a soft, dry cloth to prevent the liquid from penetrating the wood. This proactive approach minimizes the risk of stains and warping, preserving the elegance of your herringbone floors.
Avoid Harsh Chemicals: Gentle Products for Delicate Floors
Herringbone floors require gentle care, and harsh chemicals can strip away their protective finish. Choose cleaning products specifically designed for hardwood floors. These products effectively clean without compromising the integrity of the wood, ensuring your herringbone floors remain stunning.
Periodic Deep Cleaning: Reviving the Luster
In addition to daily maintenance, periodic deep cleaning is essential for herringbone floors. Use a specialized wood floor cleaner and follow the manufacturer’s instructions. This deep-cleaning process removes ingrained dirt and grime, reviving the luster of your herringbone floors.
Protective Measures: Furniture Pads and Area Rugs
Prevent scratches and dents by placing protective pads underneath furniture legs. This simple yet effective measure safeguards your herringbone floors from potential damage caused by furniture movement. Additionally, strategically placing area rugs in high-traffic areas adds an extra layer of protection.
Humidity Control: Maintaining Stability
Wood is sensitive to changes in humidity, and herringbone floors are no exception. Maintain a stable indoor humidity level to prevent the wood from expanding or contracting. Using a humidifier or dehumidifier, especially in regions with extreme climate variations, helps ensure the longevity of your herringbone floors.
Professional Maintenance: Expert Touch for Longevity
While regular care is crucial, professional maintenance adds an expert touch to herringbone floor care. Schedule periodic inspections and maintenance by professionals specializing in hardwood floors. They can address any emerging issues, conduct refinishing when necessary, and provide valuable guidance on caring for
Revitalize Your Space: Hardwood Floor Refinishing Excellence


Revitalize Your Space: Achieving Excellence with Hardwood Floor Refinishing
Hardwood floors are timeless, adding warmth and elegance to any space. Over time, wear and tear may take a toll, but fear not – hardwood floor refinishing is a transformative process that can breathe new life into your floors.
Assessment and Preparation
Before embarking on hardwood floor refinishing, a thorough assessment is essential. Inspect the floor for scratches, dents, or signs of water damage. Identify any areas that require repairs before the refinishing process begins. Once the assessment is complete, clear the space of furniture and prepare the floor for the refinishing journey.
Sanding Away Imperfections
Sanding is a crucial step in the hardwood floor refinishing process. It involves removing the existing finish and any imperfections on the surface. The goal is to reveal a smooth and even layer of wood. This meticulous process sets the stage for the application of a new finish that will enhance the natural beauty of the hardwood.
Choosing the Right Finish
Selecting the right finish is a key decision in hardwood floor refinishing. Options include polyurethane, oil-based, or water-based finishes, each offering unique benefits. Polyurethane provides durability, while oil-based finishes bring out the wood’s natural color. Water-based finishes, on the other hand, dry faster and emit fewer fumes. Consider the specific needs of your space and lifestyle when making this choice.
Staining for a Personalized Touch
If you desire a change in the color of your hardwood floors, staining is an excellent option during the refinishing process. Stains come in a variety of shades, allowing you to personalize your space. Whether you prefer a classic oak tone or a darker walnut hue, staining adds character and a fresh aesthetic to your hardwood floors.
Precision in Application
The application of the chosen finish requires precision. Even, smooth strokes are essential to achieving a uniform and professional look. Whether you opt for a glossy or matte finish, attention to detail during the application process ensures a stunning result. Take the time to follow the manufacturer’s guidelines for optimal outcomes.
Drying and Curing Time
Patience is key during the hardwood floor refinishing process. After the application of the finish, allow ample time for drying and curing. This ensures that the finish adheres properly, providing a resilient and long-lasting surface. Rushing this stage may compromise the overall quality of the refinishing job.
Post-Refinishing Care
Once the hardwood floor refinishing is complete, implement proper care practices to maintain the beauty of your floors. Use felt pads on furniture legs to prevent scratches, place rugs in high-traffic areas, and promptly clean up spills to prevent damage. Regular cleaning with appropriate hardwood floor cleaners will help preserve the newly refinished surface.
Restoring Value and Aesthetic Appeal
Hardwood floor refinishing not only restores the aesthetic appeal of your floors but also adds value to your home. Refinished hardwood floors are a selling point for potential buyers, showcasing the timeless beauty and durability of this flooring choice.
Hardwood Floor Refinishing – Elevate Your Space
Floor Buffing Mastery: Pro Techniques for Shine

Floor Buffing Mastery: Pro Techniques for Shine
Floor buffing is an essential skill for maintaining the pristine appearance of various surfaces. Whether you are a cleaning professional or a homeowner looking to elevate your floor care routine, mastering the art of floor buffing techniques can make a significant difference in the overall aesthetic of your space.
Understanding the Basics
To embark on the journey of floor buffing mastery, it’s crucial to comprehend the basics. Begin by selecting the appropriate buffing machine and the right type of pad for your floor. Different surfaces require specific pads to achieve optimal results. Understanding the compatibility between the machine, pad, and floor type lays the foundation for a successful buffing experience.
Proper Preparation for Buffing
Before diving into the buffing process, thorough preparation is key. Start by cleaning the floor surface to remove any dirt, dust, or debris. A clean surface ensures that the buffing machine can work efficiently without encountering obstacles that might hinder its performance. Additionally, it prevents scratches on the floor and allows for a smoother buffing process.
Choosing the Right Buffing Technique
There are various buffing techniques, each serving a specific purpose. The most common techniques include spray buffing, dry buffing, and wet buffing. Understanding when and how to employ each technique is essential for achieving the desired results. Experimenting with different techniques on a small, inconspicuous area can help determine the most effective approach for your specific floor type.
Proper Movements and Pressure
When operating a buffing machine, the way you move and apply pressure plays a significant role in the outcome. Maintain a steady and controlled pace, overlapping each pass slightly to avoid uneven results. Adjust the pressure based on the floor type – heavier pressure for tougher stains and lighter pressure for a final polish. Consistency in movements and pressure application contributes to a uniform and attractive floor finish.
Regular Maintenance Routine
Floor buffing is not a one-time task; it requires regular maintenance to preserve the shine. Establishing a routine that includes periodic buffing sessions can prevent the accumulation of dirt and scratches, extending the life of your floor. Regular maintenance also ensures that your floor continues to impress visitors and maintains a professional appearance.
Advanced Techniques for Exceptional Shine
For those seeking an extra level of shine, advanced floor buffing techniques can be employed. This includes using specialized polishing compounds and finishes to enhance the gloss and durability of the floor. Experimenting with these advanced techniques can take your floor buffing skills to the next level, achieving a mirror-like finish that adds elegance to any space.
Floor Buffing Techniques – Elevating Your Space
In conclusion, mastering floor buffing techniques is a valuable skill that contributes to the overall aesthetics and cleanliness of your space. By understanding the basics, preparing adequately, choosing the right technique, applying proper movements and pressure, maintaining a regular routine, and exploring advanced techniques, you can achieve a floor that radiates professionalism and sophistication.
To learn more about floor buffing techniques and discover