
Revitalize Your Space: Expert Parquet Floor Repairs

Revitalize Your Space: Expert Parquet Floor Repairs
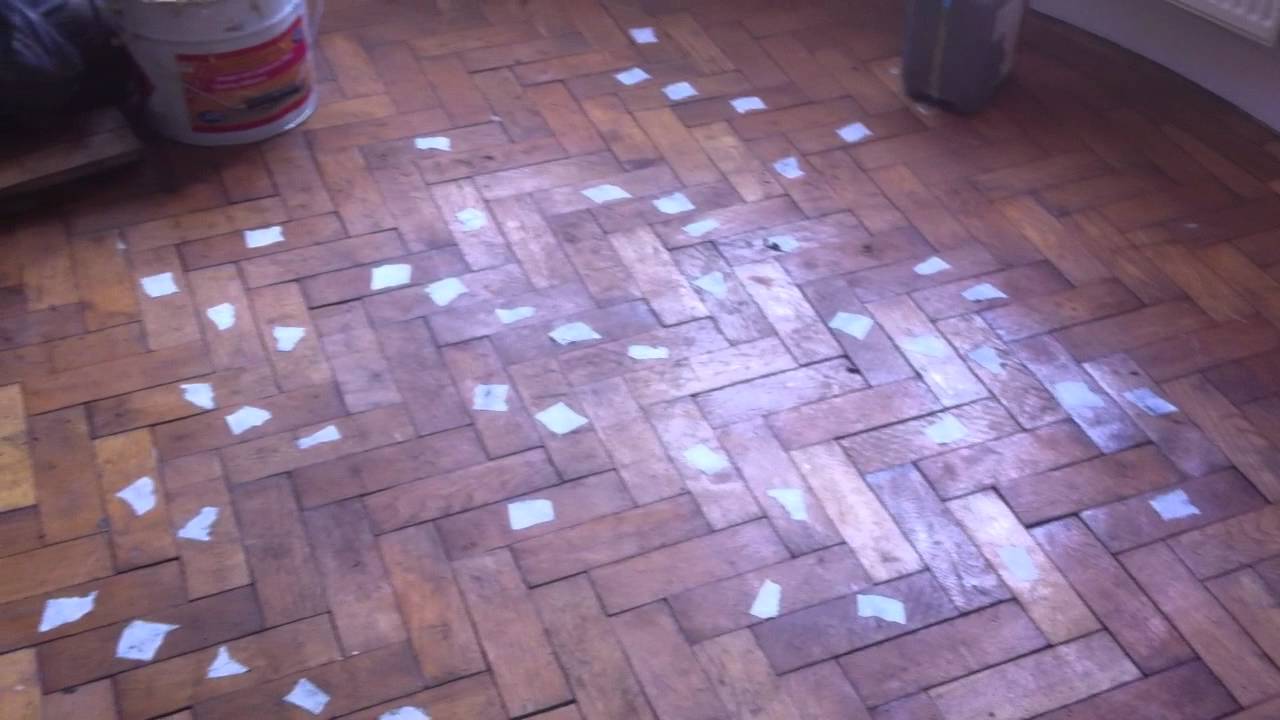
Parquet flooring adds a touch of elegance and warmth to any space, but over time, wear and tear can take a toll. If your parquet floor is showing signs of damage, fear not. Expert parquet floor repairs can breathe new life into your beloved flooring, restoring its beauty and functionality.
Understanding the Need for Repairs
The first step in the process of revitalizing your parquet floor is understanding the need for repairs. Common issues include scratches, dents, warped boards, and water damage. Identifying the specific problems allows for a targeted and effective repair approach.
Professional Assessment for Optimal Solutions
Before diving into repairs, it’s crucial to enlist the services of professionals who specialize in parquet floor restoration. A professional assessment will help determine the extent of the damage and the best course of action. This step ensures that the repairs address both visible and underlying issues.
Scratch and Dent Repairs: Precision Matters
For parquet floors marred by scratches and dents, precision is key. Expert technicians employ techniques to carefully sand and fill damaged areas, seamlessly blending repairs with the surrounding flooring. The result is a smooth and flawless surface that retains the parquet’s original charm.
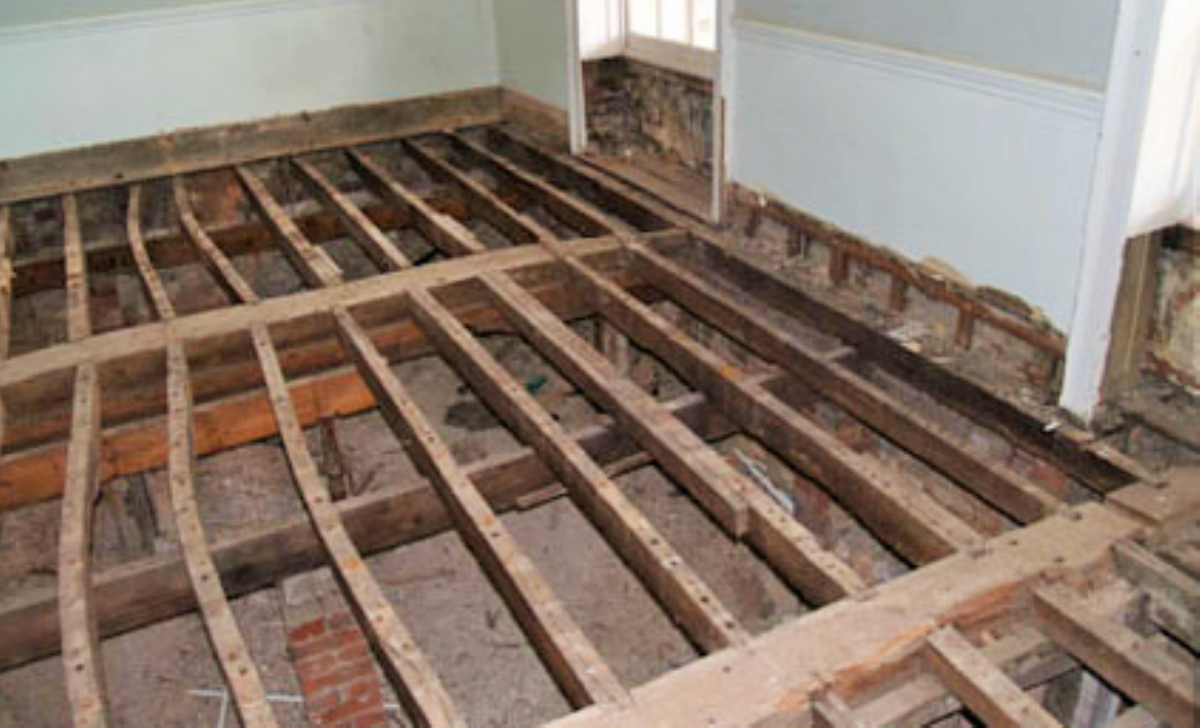
Addressing Warped Boards: Restoring Structural Integrity
Warped boards can be a common challenge in parquet floors, often caused by moisture or changes in temperature. Professional repair involves addressing the underlying cause, ensuring the floor’s structural integrity is restored. This step is crucial for preventing future warping and maintaining a stable and durable flooring surface.
Water Damage Recovery: Salvaging Your Investment
Water damage can be a parquet floor’s worst enemy, leading to discoloration, swelling, and even mold growth. Expert repairs involve thorough drying, sanding, and refinishing to salvage the flooring and prevent further deterioration. Prompt action is essential to minimize the impact of water damage and protect your investment.
Seamless Repairs for a Cohesive Look
The goal of parquet floor repairs is not only to fix individual issues but also to achieve a cohesive and uniform appearance. Skilled technicians ensure that repairs seamlessly integrate with the existing flooring, preserving the overall aesthetic appeal of the space.
Preserving the Original Finish: Skillful Refinishing
In some cases, parquet floor repairs may involve refinishing to restore the original finish. This process requires skill and expertise to match the existing finish accurately. The result is a refreshed and renewed parquet floor that looks as good as new.
Adding Durability with Protective Coatings
To enhance the longevity of your repaired parquet floor, protective coatings are applied. These coatings act as a shield, safeguarding the surface from future damage and maintaining its beauty over time. This final step adds durability and ensures your parquet floor remains a lasting investment.
Parquet Floor Repairs: A Link to Timeless Elegance
When seeking expert parquet floor repairs, look no further than Parquet Floor Repairs. Our skilled professionals understand the intricacies of parquet flooring and are dedicated to restoring its timeless elegance. Trust us to bring your parquet floor
Floor Restoration Tips: Bring Your Surfaces Back to Life

Floor Restoration Tips: Bring Your Surfaces Back to Life
Whether you’ve just moved into a new home or want to revitalize the beauty of your existing space, floor restoration can make a significant difference. Here are some valuable tips to help you bring your surfaces back to life.
Understanding Your Floor Type
Before diving into restoration, it’s crucial to identify the type of flooring you have. Whether it’s hardwood, laminate, tile, or another material, each surface requires specific care. Check manufacturer guidelines or consult with experts to ensure you’re using the right products and techniques.
Deep Cleaning for a Fresh Start
Start the restoration process with a thorough deep cleaning. Remove dirt, grime, and any old finishes that may have dulled the appearance of your floors. Use appropriate cleaning solutions and tools, taking care not to damage the surface. This initial step sets the foundation for the restoration process.
Repairing and Patching
Inspect your floors for any damage, such as scratches, dents, or cracks. Depending on the material, you may need to fill in gaps or replace damaged sections. For wooden floors, consider sanding to remove imperfections and create a smooth surface. Patching up these issues ensures a more even and attractive finish.
Choosing the Right Finish
Selecting the right finish is a critical aspect of floor restoration. The finish not only enhances the aesthetic appeal but also provides protection against future wear and tear. Whether you opt for a glossy finish for a sleek look or a matte finish for a more natural appearance, ensure it complements your overall design and lifestyle.
Applying the Finish with Care
Once you’ve chosen the appropriate finish, apply it with precision. Use long, even strokes to achieve a uniform coating. Pay attention to drying times and ventilate the space adequately. Applying the finish correctly ensures durability and a polished look that lasts.
Routine Maintenance for Longevity
After restoring your floors, implement a routine maintenance plan to preserve their beauty. Regular cleaning, avoiding harsh chemicals, and using furniture pads to prevent scratches contribute to the longevity of your newly restored surfaces. By incorporating these habits, you’ll enjoy the results of your hard work for years to come.
Seeking Professional Assistance
For complex or extensive floor restoration projects, don’t hesitate to seek professional assistance. Flooring experts have the knowledge and tools to tackle challenging issues and ensure a flawless finish. Consulting with professionals can save you time and potentially prevent costly mistakes.
Floor Restoration Tips for Every Homeowner
In conclusion, floor restoration is a rewarding endeavor that can breathe new life into your living space. Understanding your floor type, deep cleaning, repairing and patching, choosing the right finish, applying it carefully, and maintaining your floors are key steps. For more in-depth guidance and a wide range of floor restoration products, visit Floor Restoration Tips. Whether you’re a DIY enthusiast or prefer professional help, these tips will help you achieve stunning results and enjoy the beauty of your floors for years to come.
Laminate Floor Repairs: Tips for Restoring Beauty

Reviving Elegance: Laminate Floor Repairs
Understanding Laminate Flooring: A Durable Choice
Laminate flooring is prized for its durability and aesthetic appeal, but daily wear and tear can take a toll over time. Understanding the common issues that arise and how to address them is essential for maintaining the beauty and longevity of laminate floors.
Dealing with Surface Scratches: Simple Fixes for Superficial Damage
Surface scratches are a common concern with laminate floors, especially in high-traffic areas. Fortunately, most surface scratches are superficial and can be addressed with simple solutions. Using a laminate floor repair kit or filling the scratches with a color-matching putty can effectively minimize the visibility of these blemishes.
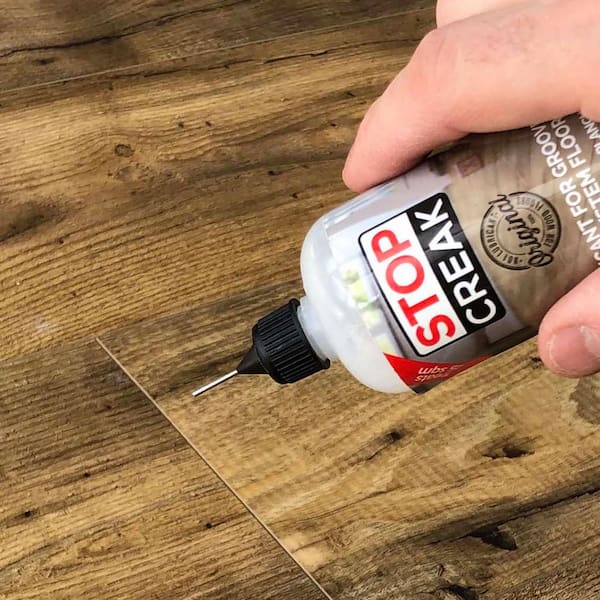
Handling Gaps and Popping Sounds: Seasonal Adjustments
Gaps and popping sounds may occur in laminate floors due to changes in temperature and humidity. These seasonal adjustments can lead to the contraction and expansion of the laminate planks. Addressing gaps may involve using a flooring repair kit with filler, while ensuring proper acclimatization during installation can prevent future issues.
Repairing Water Damage: Swift Action for Long-Term Preservation
Water damage is a serious concern for laminate floors, as moisture can lead to warping and discoloration. Swift action is crucial when dealing with spills or leaks. Use a dry and absorbent cloth to immediately soak up any liquid. If water damage is extensive, consulting a professional for laminate floor repairs is recommended to prevent further harm.
Replacing Damaged Planks: A Lasting Solution for Extensive Issues
In cases where the damage is beyond simple repairs, replacing individual planks becomes necessary. Most laminate flooring systems are designed with a “floating” installation method, allowing for the removal and replacement of damaged planks without affecting the entire floor. Carefully follow manufacturer guidelines for a seamless replacement process.
Addressing Chips and Dents: DIY Solutions for Minor Damage
Chips and dents can occur in laminate floors, particularly in areas prone to heavy furniture or dropped objects. DIY solutions include using colored wax or putty to fill in the damaged areas. Lightly sanding the repaired spots and applying a protective sealant can help blend the repairs with the surrounding flooring.
Preventing Future Damage: Practical Maintenance Tips
Prevention is often the best strategy for maintaining laminate floors. Implementing practical maintenance tips can significantly reduce the risk of damage. Use felt pads under furniture legs to prevent scratches, place mats at entry points to capture dirt, and avoid wearing high heels or shoes with cleats that may dent or scratch the laminate surface.
Consulting Professional Services: Expertise for Complex Issues
For extensive or complex laminate floor repairs, seeking professional services is a wise choice. Professional flooring technicians have the expertise to assess and address issues effectively. Whether it’s repairing water damage, replacing damaged planks, or handling intricate problems, their knowledge ensures a thorough and lasting solution.
Routine Cleaning for Longevity: Preserving Laminate Beauty
Routine cleaning is integral to the longevity of laminate floors. Regularly sweep or vacuum to remove dirt and debris that can cause scratches. Damp mop using a well-wrung
Revitalize Your Space: Hardwood Floor Refinishing Excellence


Revitalize Your Space: Achieving Excellence with Hardwood Floor Refinishing
Hardwood floors are timeless, adding warmth and elegance to any space. Over time, wear and tear may take a toll, but fear not – hardwood floor refinishing is a transformative process that can breathe new life into your floors.
Assessment and Preparation
Before embarking on hardwood floor refinishing, a thorough assessment is essential. Inspect the floor for scratches, dents, or signs of water damage. Identify any areas that require repairs before the refinishing process begins. Once the assessment is complete, clear the space of furniture and prepare the floor for the refinishing journey.
Sanding Away Imperfections
Sanding is a crucial step in the hardwood floor refinishing process. It involves removing the existing finish and any imperfections on the surface. The goal is to reveal a smooth and even layer of wood. This meticulous process sets the stage for the application of a new finish that will enhance the natural beauty of the hardwood.
Choosing the Right Finish
Selecting the right finish is a key decision in hardwood floor refinishing. Options include polyurethane, oil-based, or water-based finishes, each offering unique benefits. Polyurethane provides durability, while oil-based finishes bring out the wood’s natural color. Water-based finishes, on the other hand, dry faster and emit fewer fumes. Consider the specific needs of your space and lifestyle when making this choice.
Staining for a Personalized Touch
If you desire a change in the color of your hardwood floors, staining is an excellent option during the refinishing process. Stains come in a variety of shades, allowing you to personalize your space. Whether you prefer a classic oak tone or a darker walnut hue, staining adds character and a fresh aesthetic to your hardwood floors.
Precision in Application
The application of the chosen finish requires precision. Even, smooth strokes are essential to achieving a uniform and professional look. Whether you opt for a glossy or matte finish, attention to detail during the application process ensures a stunning result. Take the time to follow the manufacturer’s guidelines for optimal outcomes.
Drying and Curing Time
Patience is key during the hardwood floor refinishing process. After the application of the finish, allow ample time for drying and curing. This ensures that the finish adheres properly, providing a resilient and long-lasting surface. Rushing this stage may compromise the overall quality of the refinishing job.
Post-Refinishing Care
Once the hardwood floor refinishing is complete, implement proper care practices to maintain the beauty of your floors. Use felt pads on furniture legs to prevent scratches, place rugs in high-traffic areas, and promptly clean up spills to prevent damage. Regular cleaning with appropriate hardwood floor cleaners will help preserve the newly refinished surface.
Restoring Value and Aesthetic Appeal
Hardwood floor refinishing not only restores the aesthetic appeal of your floors but also adds value to your home. Refinished hardwood floors are a selling point for potential buyers, showcasing the timeless beauty and durability of this flooring choice.
Hardwood Floor Refinishing – Elevate Your Space
Marble Floor Polishing: Unveiling Radiant Elegance


Unveiling the Brilliance: The Art of Marble Floor Polishing
Marble floors exude timeless elegance, but maintaining their pristine appearance requires dedicated care. Marble floor polishing is a transformative process that revitalizes the natural beauty of this luxurious material. Let’s delve into the intricacies of marble floor polishing and unveil the steps to achieve radiant elegance.
Understanding the Beauty of Marble Floors
Marble, known for its distinctive veining and lustrous surface, is a natural stone that adds sophistication to any space. Marble floors are coveted for their timeless appeal and ability to elevate the aesthetic of both traditional and modern interiors. However, over time, foot traffic and daily wear can dull the marble’s shine, necessitating proper polishing to restore its brilliance.
Assessing the Condition of Your Marble Floors
Before diving into the polishing process, it’s essential to assess the condition of your marble floors. Identify any scratches, stains, or areas with diminished shine. Understanding the specific issues allows you to tailor the polishing approach to address the unique needs of your marble surfaces.
Preparation: Clearing the Space and Protecting Surfaces
Preparing the space for marble floor polishing is a crucial initial step. Clear the area of furniture and any obstacles. Additionally, protect walls and baseboards with tape or plastic sheeting to prevent splatters. Taking these precautions ensures a smooth and efficient polishing process without causing damage to surrounding elements.
Surface Cleaning: Removing Dirt and Debris
Before diving into polishing, thorough cleaning is essential. Remove dirt, dust, and debris from the marble surface using a soft broom or vacuum cleaner. This prevents abrasive particles from scratching the marble during the polishing process. For any stains, use a mild, pH-neutral cleaner suitable for marble surfaces.
Selecting the Right Polishing Method
There are various methods for marble floor polishing, and the choice depends on the condition of the marble. Honing is suitable for removing minor scratches and etches, while crystallization involves applying a chemical agent to create a protective layer. Wet polishing with diamond pads is effective for restoring a high-gloss finish. Assess your marble’s needs and choose the method accordingly.
Honing: Smoothing Out Imperfections
Honing is a technique that involves smoothing out imperfections on the marble surface. This process is effective for addressing minor scratches, etches, and dull spots. Honing utilizes abrasive pads to gently remove a thin layer of the marble, revealing a smoother and more uniform finish.
Crystallization: Creating a Protective Layer
Crystallization is a chemical process that creates a protective layer on the marble surface. A crystallization agent is applied and buffed into the marble using a weighted machine. This process not only restores shine but also enhances the marble’s resistance to scratches and stains. Crystallization is particularly suitable for high-traffic areas.
Wet Polishing: Restoring the High-Gloss Finish
Wet polishing with diamond pads is a widely used method for restoring a high-gloss finish to marble floors. This process involves gradually polishing the marble with pads of varying grits, starting with a coarser grit and progressing to finer ones. Water is